Gauge:
- 10 cm/4 inch square: 19 DC wide, 9 DC rows tall
Yarn:
- Lion Brand Heartland – Yosemite (Worsted weight acrylic) – Jussssst over 1 skein
Materials:
- 5.5 mm hook
- Tapestry needle
- Scissors
Abbreviations:
- Ch – chain
- St – stitch
- Sc – single crochet
- Dc – double crochet
- R – round
Special Stitch:
V-Stitch:
- DC, ch 2, DC in same stitch
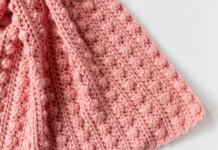
Bobble stitch: dc5tog
- *yarn over, insert hook into st, yarn over, pull up a loop, yarn over, pull through first 2 loops* repeat from * to * 4 times, yarn over pull through all 6 loops
Cardigan is made almost entirely in double crochet stitches. Single crochet stitches are used during bobble rows to make them more pronounced. Bobble rows are worked on wrong side rows as this will also help make them more pronounced
Ch 3 counts as a stitch only in row 1. After row 1, the turning chain 1 does not count as a stitch.
Instructions:
Ch 50
Row 1: DC in 4th ch from hook, work 1 DC in next 4 chs, v-stitch in next, DC in next 9 chs, v-stitch in next, DC in next 14 sts, v-stitch in next, DC in next 9 chs, v-stitch in next, DC in remaining 6 sts, turn (52 sts and 4, ch2 spaces)
Row 14: Ch 1, SC in next 3 sts, bobble st in next, *SC in next 7 sts, bobble st in next*, repeat from * to * 7 times, SC in last 4 sts
Row 15-17: Ch 1, DC in each st around, turn.
Row 18: Ch 1, SC in first st, bobble in next, SC in next 5 sts, bobble in next. *SC in next 7 sts, bobble in next*, repeat from * to * 6 times. SC in next 6 sts, bobble in next, SC in last st, turn.
Row 19-21: Ch 1, DC in each st around, turn.
Row 22: Ch 1, SC in next 3 sts, bobble st in next, *SC in next 7 sts, bobble st in next*, repeat from * to * 7 times, SC in last 4 sts
Row 23-24: Ch 1, DC in each st around, turn.
Row 25: Ch 1, DC in first st, *fpdc in next, bpdc in next**, repeat until one st remaining. Place a DC in last st of round. Do not fasten off
Cardigan edge:
Turn work slightly and single crochet up approximately 3/4 of the way up the sweater towards the neckline.
- The number of single crochets is not important. It is more important that the single crochets are placed evenly along the edge. If there are too many or too few stitches, the edge will wrinkle or pucker.
Cardigan ties:
Once you are approximately 16 cm (6 in) up from the bottom edge of the sweater, ch 35, turn, sl st in second ch from hook and in each of the next chs.
Place 1 SC in edge of cardigan to anchor tie to sweater. Place approximately 7 more SC up edge of sweater.
Ch 35, turn, sl st in second ch from hook and in each of the next chs. Place 1 SC in edge of cardigan and continue single crocheting along edge of cardigan.
Neckline
Place 3 SC in the corner between the front edge of the cardigan and neckline to create an even corner
Continue evenly single crocheting along neckline, placing 3 SC in the next corner where the neckline and cardigan edge meet.
Repeat instructions for cardigan ties on second edge of sweater, ensuring both sides mirror each other. For example, if there are 7 SC between your ties on the first edge, place 7 SC between your ties on the second edge.
At the end of second edge, fasten off.
Right Sleeve:
Join yarn at bottom of sleeve, to the left of the bobble.
Row 1: Ch 1, DC evenly around sleeve opening, sl st to join first DC of round, turn (32 sts).
- There is a bobble along the sleeve opening, do your best to squeeze your DC into it!
- You may find it helpful to mark the first and last st of each round to keep track
Row 2: Ch 1, SC in next 2 sts, bobble st in next, *SC in next 7 sts, bobble st in next**, repeat from * to *, repeat 2 times, SC in remaining 5 sts, sl st to join, turn (32 sts)
Row 3: Ch 1, DC in each st around, sl st to join, turn (32 sts).
Row 4: Ch 1, DC in each st around, until 2 sts remain, dc2tog, sl st to join, turn (31 sts)
Row 5: Repeat row 3 (31 sts)
Row 6: SC in next 6 sts, bobble st in next, *SC in next 7 sts, bobble st in next**, repeat from * to ** 2 times, sl st to join, turn (31 sts)
Row 7: Repeat row 4 (30 sts)
Row 8: Repeat row 3 (30 sts)
Row 9: Repeat row 4 (29 sts)
Row 10: Ch 1, SC in next 2 sts, bobble st in next, SC in next 5 sts, bobble st in next, SC in next 7 sts, bobble st in next, SC in next 7 sts, bobble st in next, SC in remaining 4 sts, sl st to join, turn (29 sts)
Row 11: Repeat row 4 (28 sts)
Row 12: Repeat row 4 (27 sts)
Row 13: Repeat row 4 (26 sts)
Row 14: Ch 1, SC in next 3 sts, bobble st in next, SC in next 6 sts, bobble st in next, SC in next 7 sts, bobble st in next,, SC in remaining 7 sts (26 sts)
Row 15: Repeat row 4 (25 sts)
Row 16: Repeat row 3 (25 sts)
Row 17: Ch 1, *fpdc in next, bpdc in next**, repeat until end, sl st to join, fasten off.
Left Sleeve:
Left sleeve is worked slightly different because it is reversed from the right sleeve.
Repeat instructions for right sleeve until row 10.
Row 10: Ch 1, SC in first St, bobble in next, SC in next 6 sts, bobble in next, *SC in next 7 sts, bobble in next**, repeat from * to ** once, SC in remaining 4 sts, sl st to join, turn.
Row 11-13: Ch 1, DC in each st around, until 2 sts remain, dc2tog, sl st to join, turn (28, 27, 26 sts)
Row 14: Ch 1, SC in first 3 sts, bobble in next, *SC in next 7 sts, bobble in next**, repeat from * to ** once, SC in remaining 6 sts
Row 15: Ch 1, DC in each st around, until 2 sts remain, dc2tog, sl st to join, turn (25 sts)
Row 16: Ch 1, DC in each st around, sl st to join, turn (25 sts)
Row 17: Ch 1, *fpdc in next, bpdc in next**, repeat until end, sl st to join, fasten off.
All done!!


