

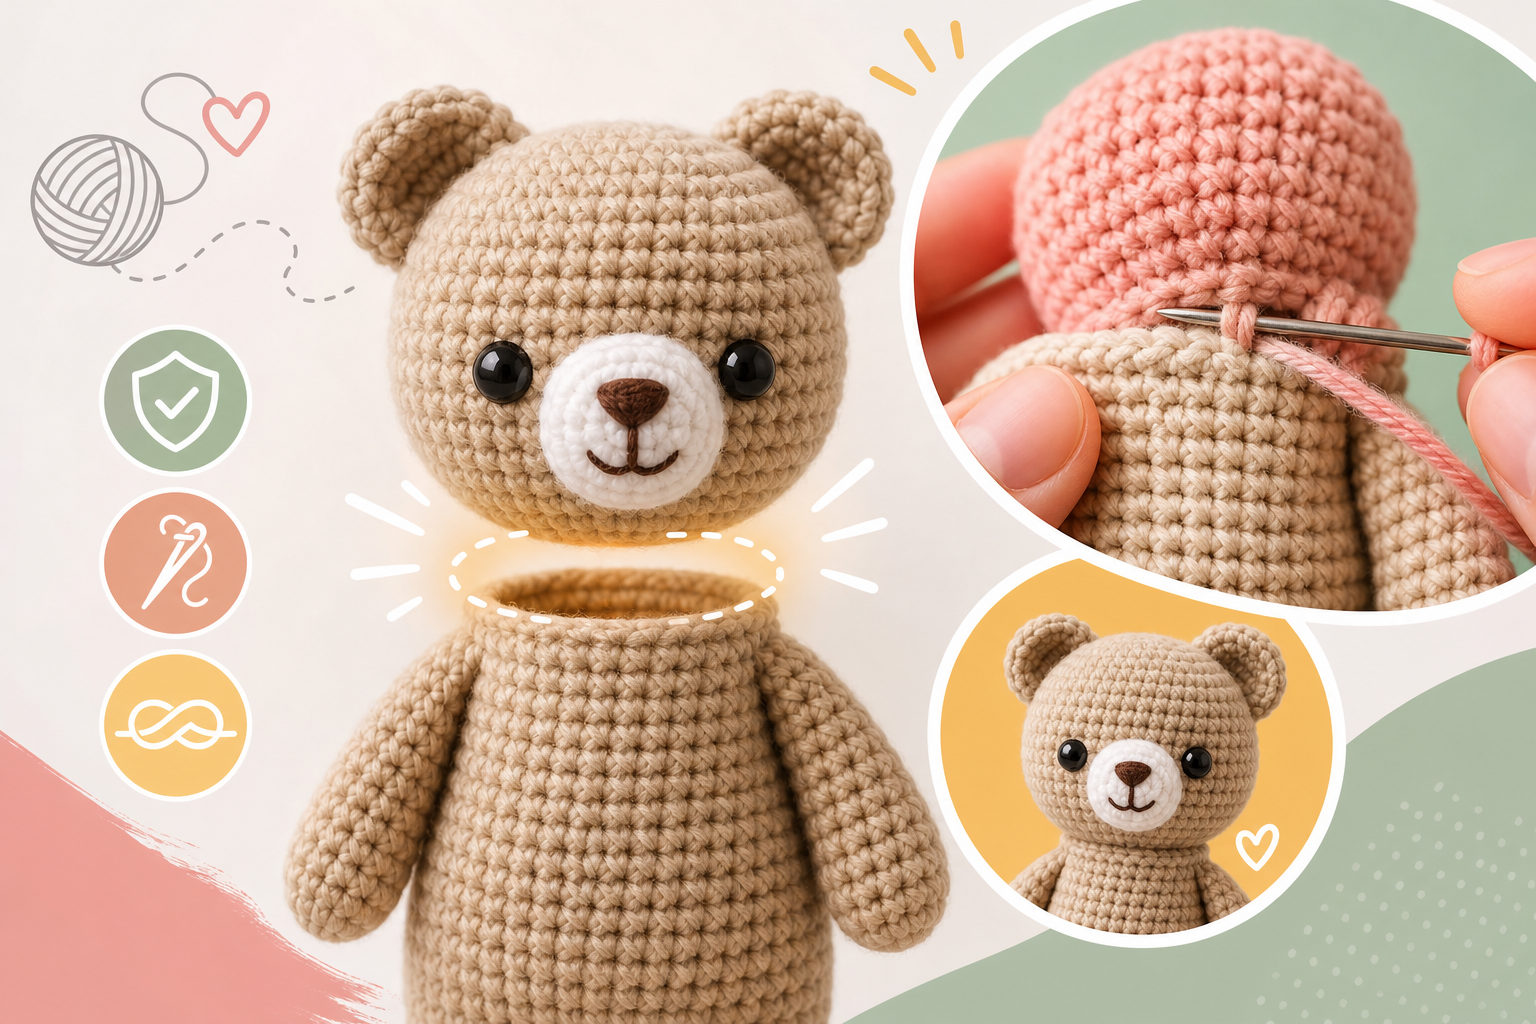
Anyone who’s spent hours crocheting an amigurumi knows the tension that comes with the final step: putting it all together. You pick colors and stitches with care, but a crooked arm or a floppy ear can turn excitement into frustration.
That feeling when you finish your toy and see that a limb is off-center or the head wobbles is tough—especially after all the effort you put in.
The real trick to avoiding this? Pay attention to details from the very beginning.
To join your amigurumi pieces so they look good and stay sturdy, always pin them before sewing and count rows or stitches to line everything up. Use the same yarn as your project with a blunt needle, and sew each seam twice: once to anchor, once to seal any gaps.
Tuck the yarn tail inside for a seamless finish.
This approach pays off in the final look—whether you’re making a keepsake for a child or a collectible for your shelf.
Which Stitch Should You Use for Each Seam?
The stitch you choose for each join really changes the look of your amigurumi. In most cases, you’ll pick between the whip stitch and the mattress (ladder) stitch.
Whip stitch is simple and reliable—great for spots that won’t show much, like under arms or where legs attach. You pass the needle through the outer loops of both pieces and pull the yarn to join. Steady tension is key here: tight enough to hold, but not so tight the crochet puckers.
For seams that will be visible, like attaching the head or big ears, the mattress stitch is my favorite. It weaves between the pieces, blending the seam right into the crochet so it’s nearly invisible. The join looks flat and smooth, with no steps or bumps.
When I’m working, I use whip stitch for hidden spots and mattress stitch where appearance matters, even up close. Switching between these two makes your seams look sharper and your joins last longer.
Important tip: Always use the same yarn as your amigurumi to sew. If it’s too thick, split it into thinner strands. Avoid regular sewing thread—the difference in thickness and color can make your seams stand out or even weaken the join.
How Do You Get Amigurumi Parts Evenly Aligned?
Getting arms, legs, and ears straight is the hardest part, especially on small dolls where a single stitch off can throw the look. You can’t just eyeball it—counting is what keeps things even.
Start by laying your doll flat on the table. Take the piece to attach, find the center front or back of the body, and mark the exact row where you’ll start. Pin it and look from every angle to see if it’s straight.
Now count rows or stitches from a fixed point, like the top of the head or the center back. For arms, count how many rows from the neck and how many stitches from the body’s center for each one. Do the same for both sides and adjust until they’re even.
Before sewing, check your pinned setup from the front, side, and top. Take your time—moving a pin is way easier than picking out stitches. If something looks weird, pull the pins and try again.
Quick recap: Always count rows or stitches when joining symmetrical pieces. Don’t trust your eyes alone. Check from every side before you sew to avoid crooked limbs or uneven ears.
When Should You Stuff Amigurumi Pieces?
Stuffing is a bigger deal than it seems for shaping your amigurumi. The best time to fill each part is right before closing the seam. This way, you can shape the stuffing with your fingers and fix any lumps before you sew it shut.
For example, when sewing on an arm, fill it until it’s firm but still squeezable. If you overstuff, the seam might stretch or even pop; if it’s too soft, the arm will flop.
Use the same idea for legs, tails, and ears. For the body, leave the last opening unstitched until you’ve packed in the stuffing, then sew it closed.
From my own projects, I’ve learned that shaping the stuffing by hand gives the toy real character. I always squeeze each part to check for a smooth, rounded shape. If I find a hard spot or a hollow, I pull out or move the stuffing until it feels right.
Stuffing at the right moment also helps the toy hold its shape for good. Once you’ve sewn the seam, you can’t adjust the filling, so get it right before closing up.
What’s the Most Secure Way to Sew Amigurumi Parts?
Assembly actually begins before you grab your needle: always leave a long tail—at least 12 inches—on each piece to sew it on later. Thread this yarn onto a blunt needle that won’t split the stitches.
With your piece pinned and stuffed, start sewing at a spot you can easily hide. Use your chosen stitch (whip or mattress), making a full round to anchor the piece in place. Pull the yarn snug, but don’t let it warp the edges.
Then, sew around again in the other direction. This second pass closes any gaps and makes the seam stronger and flatter.
For toys that will be handled often, double stitching is essential. I’ve seen plenty of arms come off after a few play sessions when this step was skipped.
Leave the pins in until you’ve stitched at least halfway around. Only remove them once the piece is firmly attached. This keeps things from twisting or shifting while you work.
Important tip: Sew at a pace where you can check your work. If the seam looks uneven or puckered, pause, fix your stitches, and keep going. Patience at this stage saves you from having to redo whole sections.
How Do You Hide Seams and Yarn Tails Like a Pro?
The finishing touches are what make your amigurumi look professional. After tying off your last stitch, insert the needle back into the same hole and run the yarn tail through the inside of the piece, passing through stuffing and hidden stitches. This makes the knot and end disappear.
Run the needle back and forth inside the crochet a couple more times in different directions to lock the tail. Only then snip the end close to the surface—if the tip sneaks out, it will stay lost inside the stuffing. This method keeps loose ends from poking out, even after washing or heavy play.
At my worktable, I’ve noticed that leaving yarn tails loose or knots exposed causes seams to unravel or creates little fuzz balls on the toy’s surface. When I take the time to hide the tail properly, everything stays smooth and neat.
This final detail matters a lot if you’re selling your amigurumi or giving it to a child. Hidden yarn ends mean no hard knots or stray threads for kids to pick at.
What Are the Most Common Mistakes—and How Do You Avoid Them?
Many crafters run into the same issues when assembling amigurumi. Skipping the pinning and counting steps, using sewing thread or mismatched yarn, or trying to stuff limbs after sewing them on can all ruin the finish. Another big mistake is skipping the second round of stitching—this leaves parts more likely to come loose.
Back when I started, I rushed through these steps and ended up with dolls that had crooked ears or wobbly legs. Once I started pinning, counting, and double-stitching every seam, my toys looked much better—and stopped losing limbs after a few playtimes.
If you’re new to this, my best advice is to slow down and check each step. Don’t get discouraged by little mistakes.
Every project is a chance to improve. Over time, you’ll develop an eye for symmetry and your amigurumi will come out closer to what you pictured.
Quick recap: Use matching yarn, pin and count each piece, stuff before closing, sew each seam twice, and hide yarn tails inside. These details are what make your amigurumi stand out.
What’s the hardest part for you when putting your amigurumi together—lining everything up or making the seams strong and invisible? I’d love to hear your experience!